
Materials

- 3 curb chains. One 17 inches in length, the other two 14 inches in length.
- Two different colours of embroidery floss.
- 1 needle (large enough to thread the embroidery floss through)
- Pliers, round nose and flat nose
- Beads
- Head pins
- Jump rings
- Clasp
The Steps
1) String the first colour of embroidery thread through the needle and secure it with a knot. Make sure the length is at least 34 inches.
2) Lay out the 17 inch chain and a 14 inch chain on
the table, with the longer chain above the shorter. Then, centre the 14 inch chain to the middle of the 17 inch
chain. There should between 1-1.5 inches of extra chain on each side of the 17 inch
chain, if the 14 inch chain is centered properly. This is how the chains should be positioned when they are woven together.
3) Using the embroidery floss, tie a knot to link both chain links from each chain. Make sure you use the first chain link on the 14 inch chain when you do this.
3) Using the embroidery floss, tie a knot to link both chain links from each chain. Make sure you use the first chain link on the 14 inch chain when you do this.

4) Weave the thread through the beginning of the 14 inch chain, then continue to weave diagonally through the chains, from bottom to top.

5) Once you’ve finished weaving through the first two chains, tie a knot at the end to secure them.

6)
Take your second colour of embroidery thread and thread it through the needle, securing it with a knot at the end. Again, make sure your floss is at least 34 inches in length.
7) Line up the loose 14 inch chain with the woven 14 inch chain, setting both ends side by side.

8) Repeat steps three through five.
7) Line up the loose 14 inch chain with the woven 14 inch chain, setting both ends side by side.

8) Repeat steps three through five.

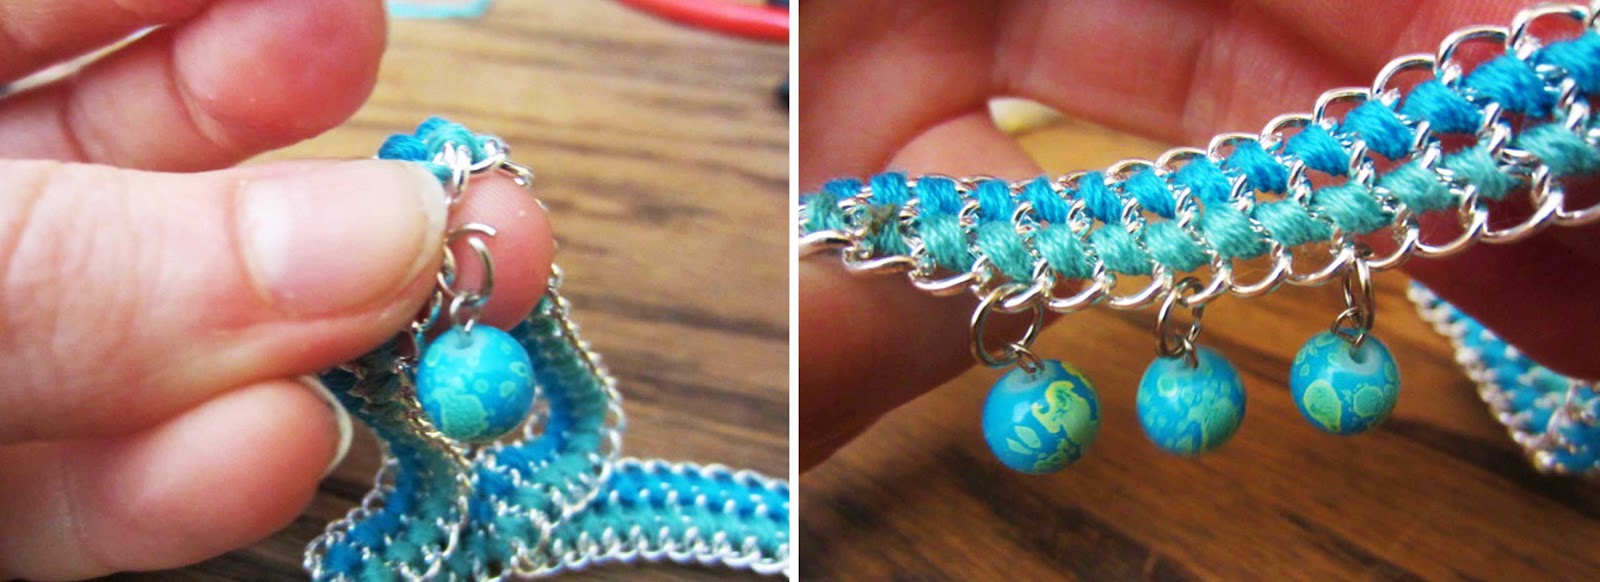
9) Once you have completed weaving your chains, prepare your beads using the head pins to add rosary loops onto the beads. If you have never done rosary loops, follow this video here for simple instructions.
10) When the rosary loops are complete, take your chain and fold it in half to locate the centre of the chain.

11) Once you have determined the centre of the chain, hook a jump ring through the centre chain link and slide your first bead onto the jump ring. Close the jump ring. Work down the necklace from the centre and add all the beads accordingly. Link one bead to each side of the centre bead as you go, so the beads are distributed equally on the necklace.
12) Add the clasp to the necklace.

13) Enjoy your new statement necklace!


13) Enjoy your new statement necklace!


No comments:
Post a Comment